

Let there be skylight Skylights offer ventilation and light to your vehicle, helping also reduce damp by circulating air. They are easy to install with a few simple tools. There is a variety of places on the internet, or local camping stores where they can be bought. Depending on your requirements they can cost anything from $50 to $000’s. The basic models offer a simple lift up method to allow air in. As the price increases so do the extras such as, multi angle openings, blinds, air circulation systems etc. A simple skylight with a blind is sufficient.
How to decide the right size
Check the inside of your roof to find where the ribs lie, measure between them and allow and two inches either side to fit between the ribs. This measurement will give you the maximum size of light you can fit. Get up on the roof to ensure that the topside is also flat so the skylight cap can sit comfortably between any other ridges. Once you have determined the right size its time to get down to work.
I advise using a non setting sealant as I’ve been told that using hard setting sealants can cause problems due to them cracking over time and allowing water in. The non setting type remains soft which allows the skylight to move slightly while the sealant remains in contact with the roof and skylight, preventing water entering.
What you will need
· Skylight
· Airsaw
· Screws
· Screwdriver
· Methylated spirits
· Soft sealant, non setting type
· Drill
· Pencil
Fitting
If you already have your ceiling and insulation installed you do not need to remove it. Determine exactly where you want the skylight to go. If you already have your ceiling and insulation installed you do not need to remove it. Center the skylight cap on the roof ensuring that you have it between the ribs on the inside, get a friend to have a look!!!
Get your pencil out and draw around the skylight cap, don’t worry about being totally accurate as you will want it to fit comfortably into the roof, it will be sealed around the hole so you do not have to worry about making it too big, so long as its close!!
Once you have your guide marked, drill a hole on one corner to allow the airsaw to get started. The reason we’re using an airsaw is that it has a finer blade than a jigsaw so the job is a lot cleaner. If you cannot access an airsaw I’m sure a jigsaw will do the job (I’ve only ever used an airsaw). Cut your roof section out by following the guide you drew with your pencil. Once completed, if your blade wasn’t long enough to reach your ceiling inside drill a hole at each corner, get inside the van, join up the holes, and cut again with the airsaw.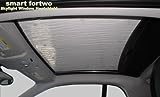
(To buy the skylight on the left, just click on the pic)
Before we fit the skylight make sure your ceiling is installed as the bottom part of the skylight will be attached to this. If there is a gap between your ceiling and roof you can make a wooden frame the same size as the hole in the roof. This will make the skylight stronger. If not make sure your insulation and ceiling are tight to the inside of the roof.
If you have made a frame, nows the time to place it between the ceiling and roof. Test fit the top and bottom part of the skylight again to ensure the screw holes for the top and bottom part are free to meet. Next step is to clean the edges of the hole with spirits, enough for the light to sit down on a clean area. You can also prime the bare metal on the edges if you wish.
Now put a rope of sealant around the groove on the top part of the skylight, don’t be afraid to get it in there, we don’t want any leaks!! Before you put the cap on the roof, smear a little sealant on the roof where the cap will sit.
Place the cap on the roof, and line up the bottom part of the skylight. Your roof is slightly curved so what we will be doing is tightening the screws enough for it to sandwich the ceiling and roof between the cap and bottom part of the skylight. Once all screw holes are lined up, tighten each screw in a 3,9,6,12 manner. This will make sure that the skylight is pulled down evenly on all sides.
Tighten all screws sufficiently, remember the skylight is made out of plastic so it will not take aggressive tightening. Best trick now is to get up on the roof to make sure the cap is sitting evenly on all sides. If you do have any leaks, it is possible to unscrew the cap and reseal it.
Err, that’s it
4 Responses
I tried your way, surprisingly, it worked well and I very satisfied with the result. Please update more posts like this that help a new RVer like me can read and study.
I tried your way, surprisingly, it worked well and I very satisfied with the result. Please update more posts like this and I will follow all of them.
I think I found a good Rv blog for a new RVer like me. I think this is a good and easy way to install a skylight so I will try it for my class B.
I think I found a good Rv blog for a new RVer like me. I think this is a good and easy way to install a skylight so I will try it for my class B. Thanks for sharing!