The next in a developing series by off-gridder Corey Naughton
In my last recipe (off-grid apple pie) I demonstrated how we can bake up some delicious goodies without the use of butter or oils. This is because the storage life of butters and oils tends to be short and for many of us it’s not plausible to produce our own. That’s why all my recipes use no liquid fats and are produced with products that have a long shelf life and/or come from your garden (to be a true off-gridder you need a garden and some chickens at the least).
This begs the question about what exactly is a “long shelf life”?
In my opinion, a truly shelf stable food item is anything that will last 10+ years when stored properly. “But Corey,” I can hear you ask: “the title of this article says it’s about bread and yeast only lasts 5 years at best.”
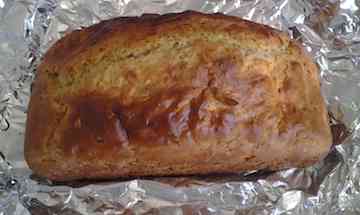
That’s why this recipe is for soda bread which uses only baking soda and baking powder to make the bread rise. Now, I know what you’re thinking … Soda bread tends to be dry and hard with a generally unappealing texture. Not my soda bread though. This bread is moist, delicious, and has the same texture as the bread your grandmother made back in the day.
Also, while my recipe is specific in it’s ingredients there’s no shortage of variations (some of which I’ll list below the recipe) to deliver the bread which best serves the season, your tastes, and available ingredients. While I suggest starting with the below recipe to familiarize yourself I encourage you to play with it and make it your own.
Ingredients (for making 1 loaf):
Dry ingredients –
All purpose flour (Or your favorite flour) = 3/4 Cup
Baking Soda = 1/4 tsp
Baking Powder = 3/4 tsp
Basil = 1/2 tsp+
Oregano = 1/2 tsp+
Thyme = Pinch
Salt = 1/4 tsp
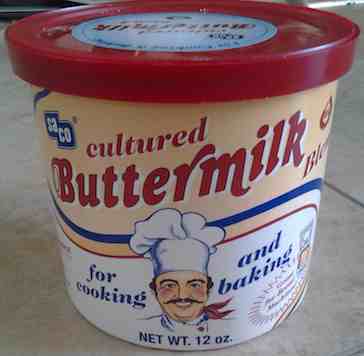
SACO Cultured Buttermilk Blend (see note) = 4 tbsp (or use as directed for the amount to produce 1 cup of buttermilk)
If you don’t have a dry cultured buttermilk then you need to go out to the store and get a bunch soon. This stuff is amazing. Simply add water and you end up with a low fat buttermilk. The container will say that it’s “best if used by” date is ~5 years out but it will store twice that length of time no problem. Trust me, you’ll love using the stuff.
Wet ingredients –
Egg (If you don’t have chickens you should get some) = 1 large
Warm Water = 2/3 cup
Honey = 2 tbsp
Vegi options –
Zucchini, summer squash, winter squash, or pumpkin (Use whatever is in season and in your garden. Zucchini and summer squash work best). = 1 packed cup after mincing
Directions:
1) Mix all your dry ingredients in a large bowl.
2) Mix all your wet ingredients in a separate bowl or measuring cup (warm water will let the honey dissolve).
3) Finely mince 1 packed cups worth of your chosen vegi (choose what’s readily available based on your season).
4) Combine your minced vegi with the dry ingredients and mix thoroughly.
5) Slowly add your premixed liquids while stirring. Note: You will not need all of the liquids
6) Continually mix while adding liquid and stop when the mixture becomes a sticky dough.
At this point, the dough should stay together in a loose ball like shape but still be sticky. If you’ve added too much liquid and the dough is like brownie mix then you may slowly add flour until the mixture reaches the desired consistency. You should have used about 3/4 to 7/8 of your liquid. The mixture can also be thickened by adding a little bit of instant rolled oats (also yummy). Remaining liquid may be brushed on the top of the loaf before baking if desired.
7) Flour your bread baking pan thoroughly (I use Pyrex bread pans but the nonstick variety will make life much easier later as you’re not oiling the pan)
8) Transfer your dough into the pan, spread evenly, and use a knife to cut a slit through the center of the dough (don’t worry if the slice forms back together slightly).
9) Allow your filled baking pan to sit on the counter while you preheat your oven to 400f.
10) Transfer your baking pan to your oven and bake for ~30 minutes. See note below.
Baking time will vary greatly based upon the moisture content of your chosen vegetable and altitude (I’m at about 4,500 feet).
The bread is done when the top is solidly golden and you can insert a knife into the center of the loaf and have it come out 98% clean (without sticky dough attached).

11) Remove the pan from your oven and allow to cool at least 30 minutes before trying to remove the loaf.
12) ENJOY! Eat it fresh and warm or wrap up for later. As an herb bread it’s fantastic after toasting a slice and topping with whatever tickles your fancy!
Here’s some of my favorite variations.
Holiday Season Off-Grid Bread
Use pumpkin as your vegi and herbs with; Cinnamon, nutmeg, and allspice (amounts to your preference).
Raisin Nut Crunch Off-Grid BreadExtra Hearty Off-Grid Bread with Oats
Use the above recipe but utilize 100% of your liquid ingredients and add minute rolled oats until you reach the proper consistency (should be about 1/3 cup).
Also, after you’ve spread your dough in the pan you can sprinkle some more oats on top. Just make sure you don’t burn them when baking.
More off-grid friendly recipes coming soon!